Introduction:
In the scope of Android development, the creation of new activities stands as a central process. Understanding the methodologies for creating these activities is essential. This blog explores various techniques for creating a new activity in Android using Java or Kotlin.
Automate Process:
In this process, Android Studio will automatically create all required classes and XML files. Also, it will manage required changes in Manifest and Gradles.
Step 1: Create a new Project
If you haven’t initiated a project yet, navigate to File => New Project. Configure the settings, specify the project name and package name, choose between Kotlin or Java as the programming language, and then click ‘Finish’ to proceed.
Step 2: Navigate to the App Module
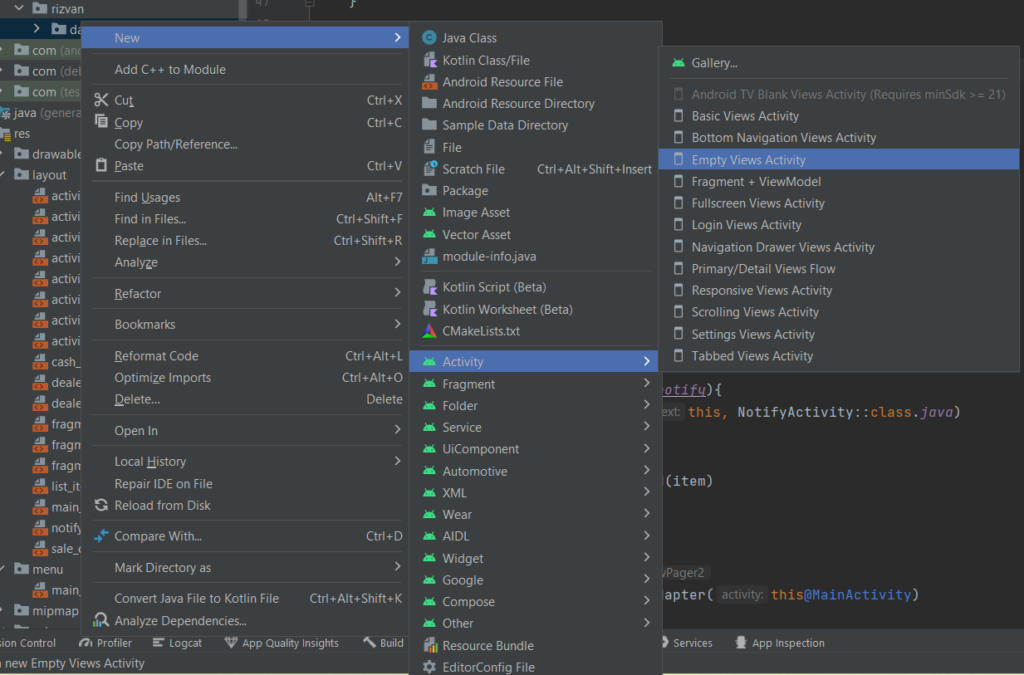
Now, access the Project Settings and navigate to the ‘app’ module. Ensure that you choose the correct package name for your project. Now, right-click on your package name and go to New => Activity => Empty View Activity. You can select other templates as you want.
Step 3: Enter Activity Details:
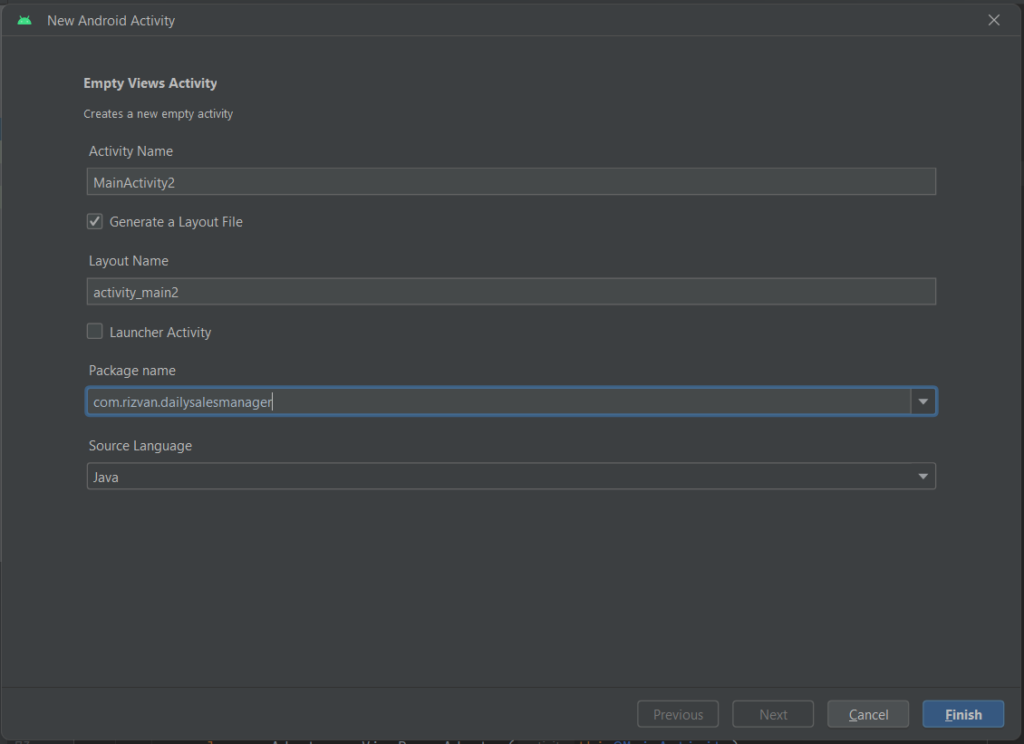
During this procedure, you’ll need to input the Activity class name, specify the XML file name, choose the package name, and select the programming language. After completing the aforementioned steps, click ‘Finish’ to generate a new Activity.
After clicking ‘Finish,’ Android Studio will automatically generate all the necessary classes and update the required settings. Now, let’s explore the manual process of creating an activity.
Manual Process:
In the example above, we covered the automated process of creating an activity. In this section, we will delve into the manual process of creating an activity.
Step 1: Create a Java/Kotlin Class
This marks the initial step. As described earlier, navigate to the ‘app’ module and proceed to create a new Java or Kotlin class as per your requirements. Ensure that the class name matches the file name of the class. Right-click on your package name and go to New => Java Class or Kotlin Class.

It will open the small dialog box. Enter the name of your class and click enter.
Step 2: Create a layout XML file
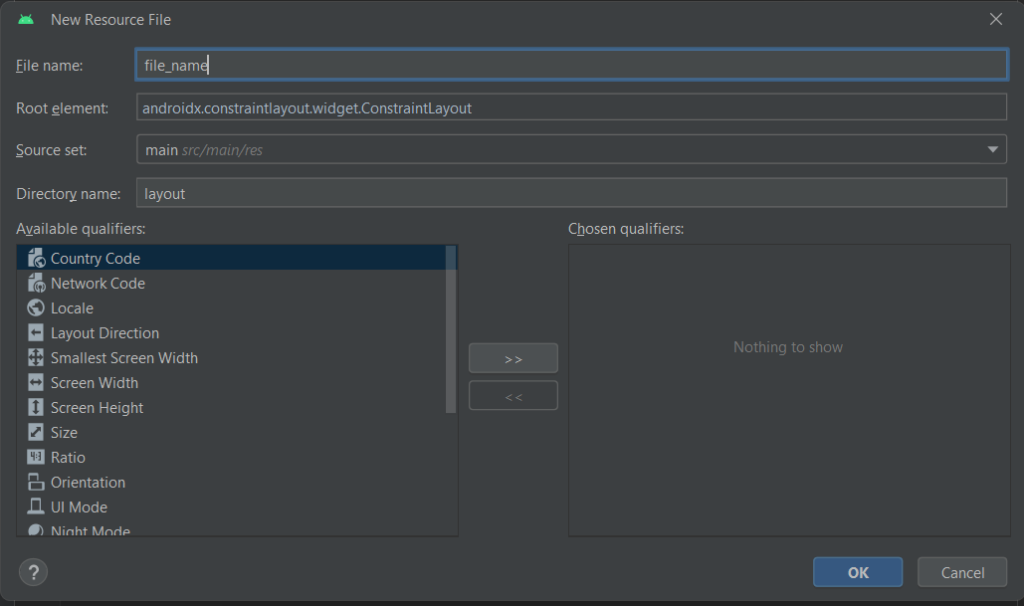
This file is the layout file of our Activity. To create a layout file, navigate to the app => res => layout module and right-click on it. Navigate to New => Layout Resource File. Enter your file name and Root Element of your layout file, and click OK.
Step 3: Apply to Manifest
This is the last step. Navigate to App => Manifest, open the Manifest file, and enter the following code inside the application tag.
        <activity
            android:name=".YourActivityName"
            android:exported="false" />
Enter your activity name within the ‘name’ tag. If you intend to open your activity from outside the application, set ‘exported=”true”‘; otherwise, leave it in its default state.
Conclusion:
We have explored two techniques for creating a new Activity. The first is an automated approach, wherein Android Studio generates the class file, layout file, and all other necessary settings. The second method involves a manual process, where we manually create all files and configure the settings. You have the flexibility to choose either of the mentioned methods or even combine elements from both approaches.
Click Here to learn more about Activity in Android development.